
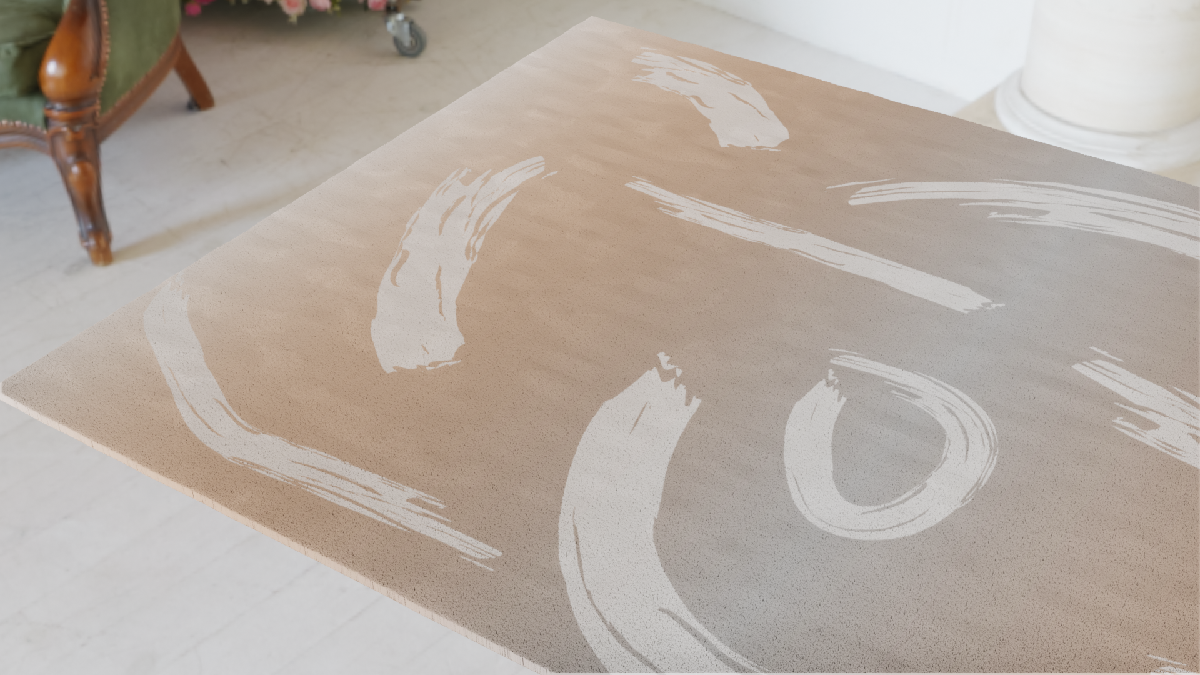
I was recently building a dining room scene with Blender, and one of the elements I wanted to added to my project was a carpet. As I searched for a model to add to my scene, I had a hard time finding patterns that I liked for my carpet.
So I decided to model my own carpet pattern and in the end, I created a collection of 10,000 patterns that could be used as carpets, which I have made available on my Gumroad account.
You can download the collection for free at: https://jesusjimenez.gumroad.com.
It was such an interesting experience making a carpet because of all the things I had to consider when making such a simple object.
First I made the pattern using Adobe Illustrator. I then took that pattern and brought it into Blender. Inside Blender, I had to play around with the carpet strands mostly by using the Hair Particle Settings to give it the look I was going for.
Because of all that I decided to write this post and make a tutorial to talk about my experience making this collection, and to go over the steps I used inside of blender.
You can learn more about the collection here: https://jesusjimenez.tech/10000-carpet-patterns/
You can also view the video tutorial on my YouTube channel: https://www.youtube.com/watch?v=enmF2XGLsYE&t=1s
Below are the steps I used to create my carpet.
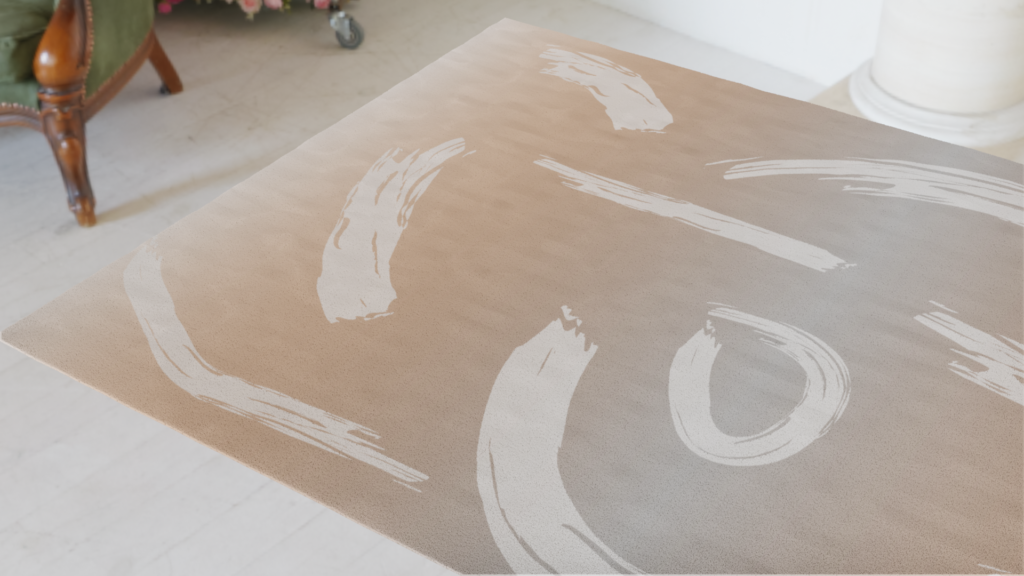
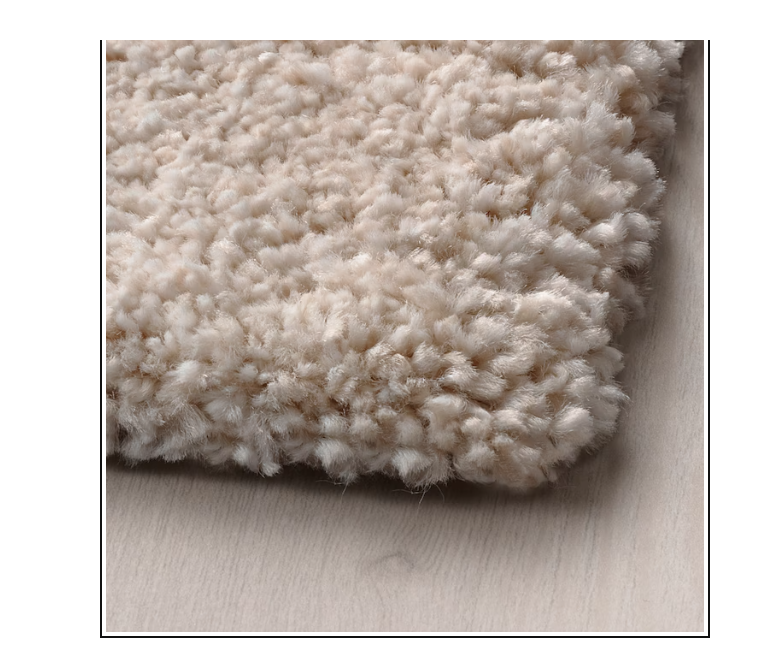
The first thing I did was to look for real-world examples. The best place I found one can use as a real-world example is the IKEA website. On each product page they list the products dimensions along with many pictures. So it really helps you get a sense of what the product looks like.
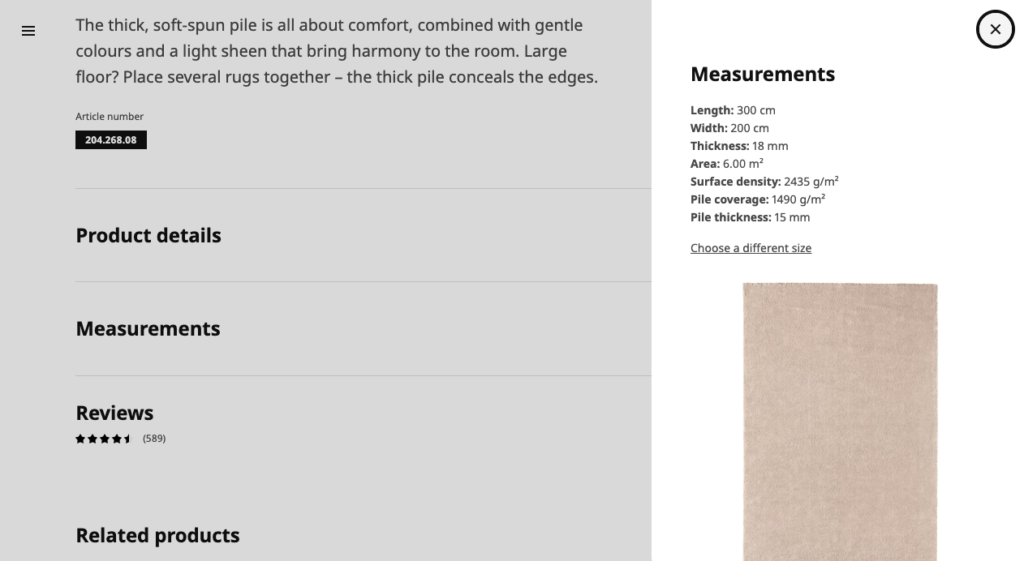
Once I had an idea of the dimensions I opened up Blender to begin to model my carpet.
Below are the steps I took to create the carpet in blender.
STEP 1: Add a mesh plane & set width+height.
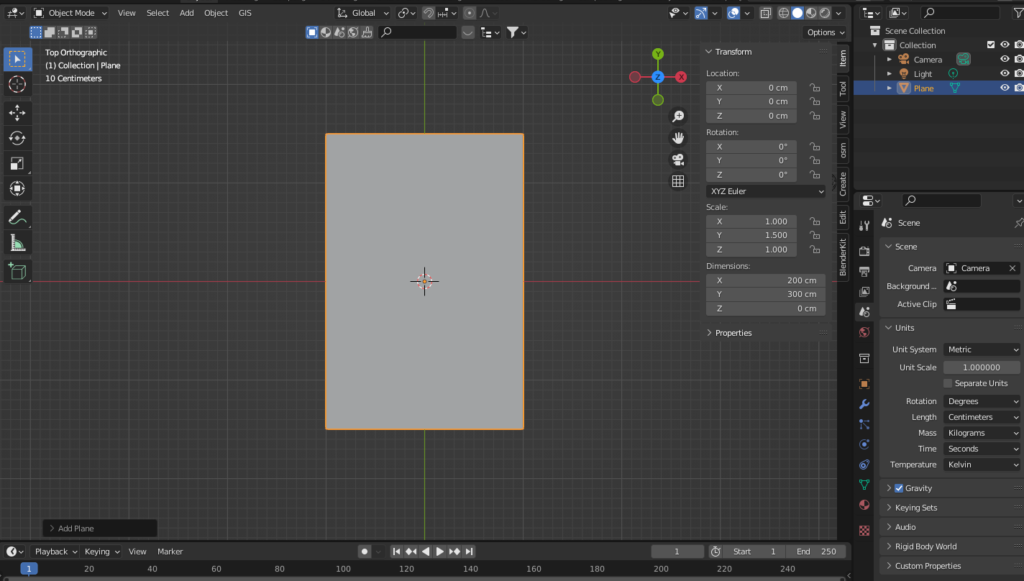
Using the measurements from the sample above we can set the Planes Width (X) to 200 cm and Length (Y) to 300cm. We will add the height (thickness of the carpet later on).
Note: Make sure to change Units to CM, under the Scene Properties Tab.
Step 2: Add Subdivision to the surface
This step is OPTIONAL. Do this in case you would like to add more details to your carpet, perhaps by adding some wrinkles or small indentations to the carpet’s surface, or curls to the sides and corners. To add these details:
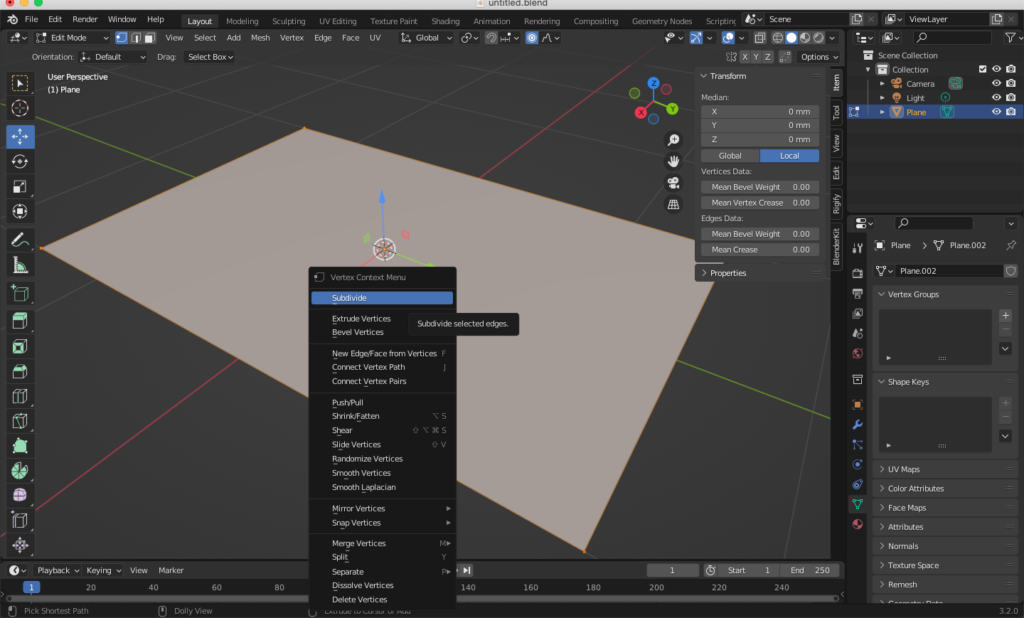
A. Go to Edit mode, right click, then Subdivide. Set the number of cuts to 10.
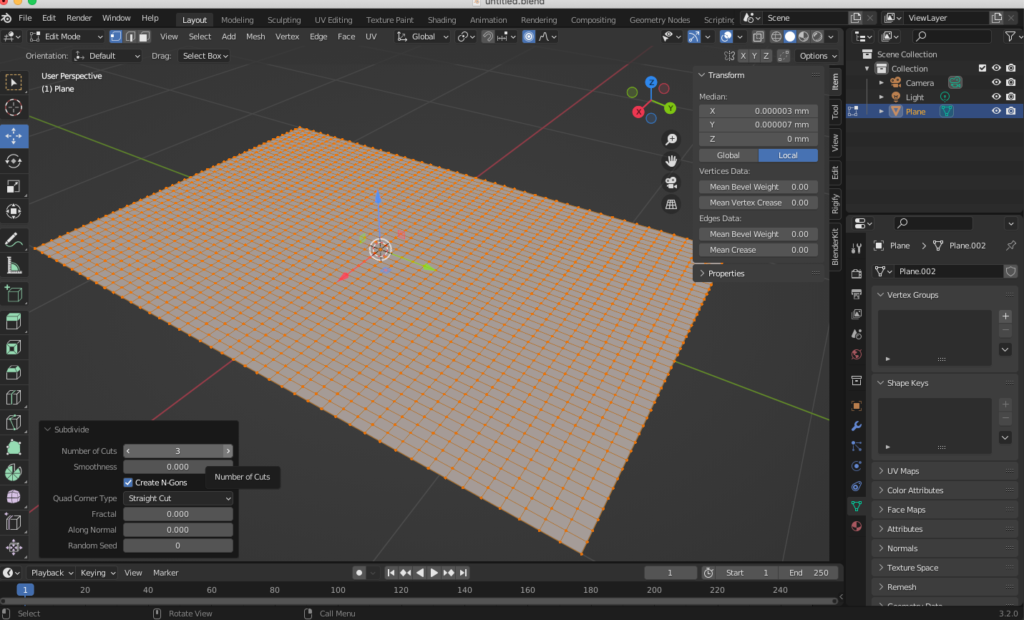
B. Repeat step A and set the number of cuts to 3.
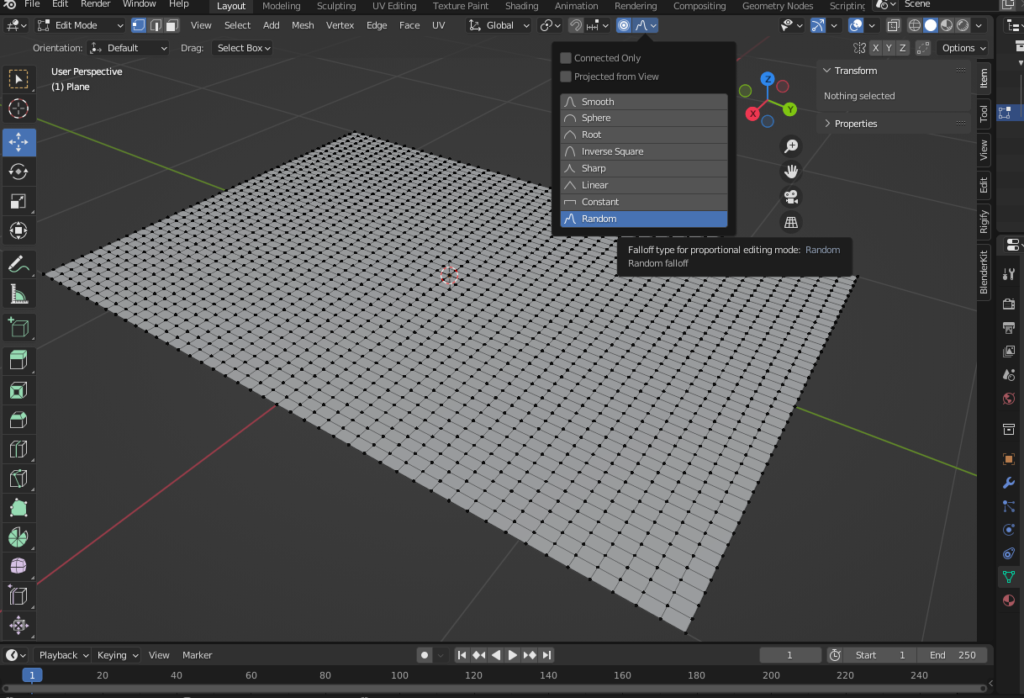
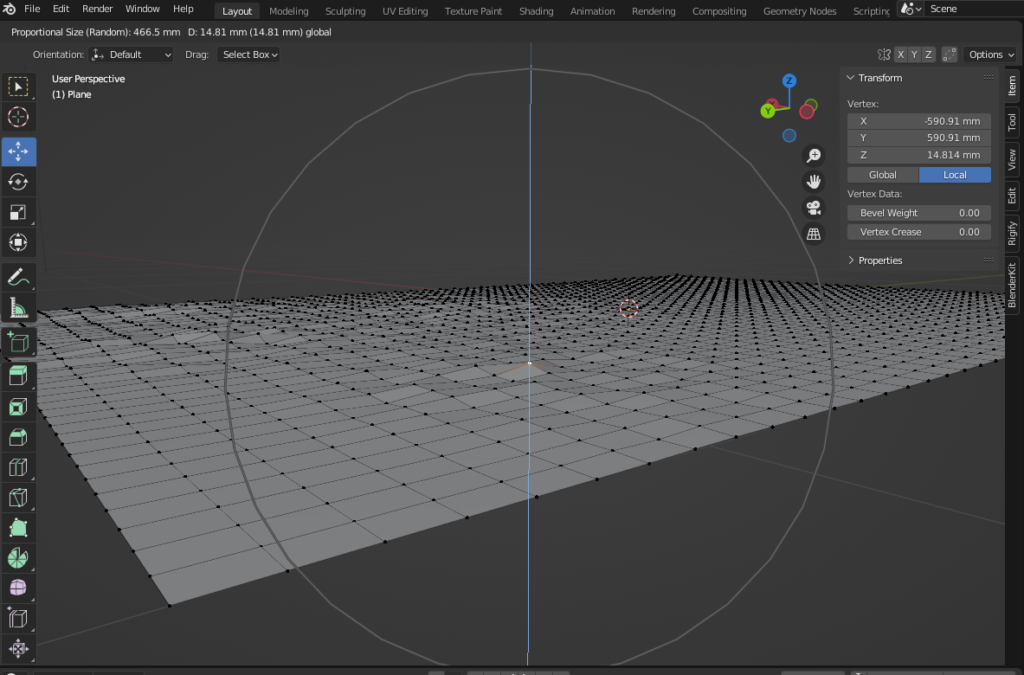
C. In Edit mode, under Proportional Editing select, Random.
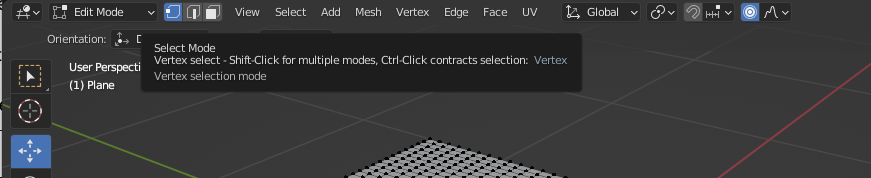
D. Next, still in Edit Mode, go to the Select Mode and choose Vertex.
E. Next, select the move tool, then select random vertex points and move them up slightly. Do this through out the carpet to add slight wrinkles to your carpet.
NOTE: You can move the mouse wheel up and down to select a larger area.
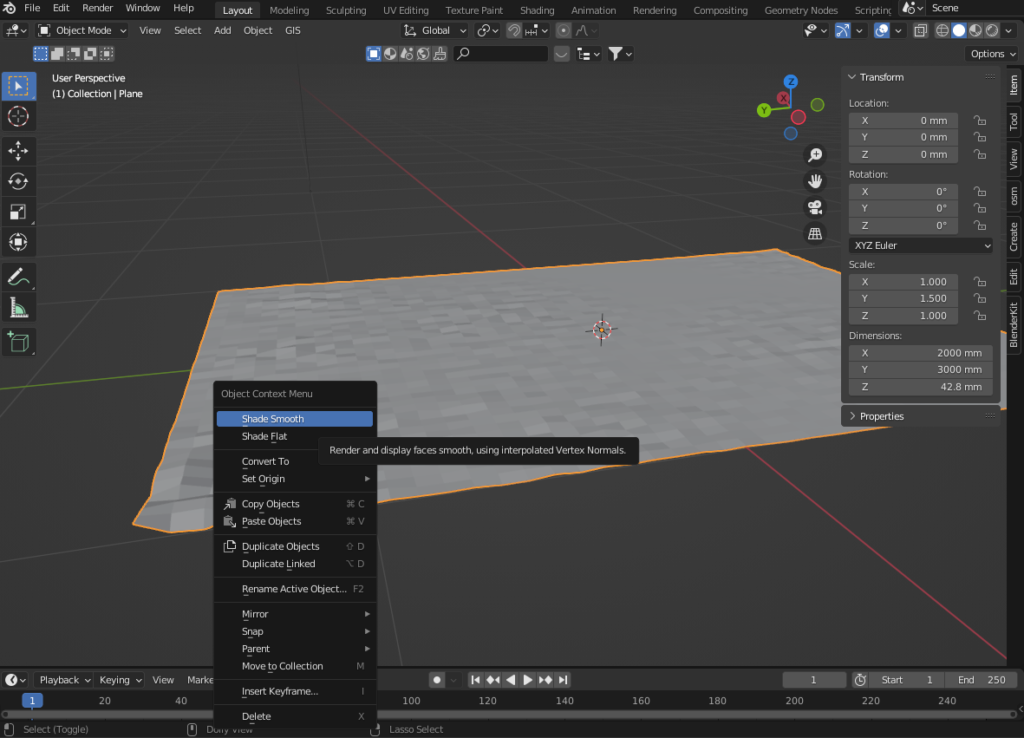
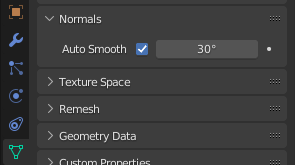
F. Next in Object mode right click on the plane and choose Shade Smooth, and in the Object Data Properties tab under Normals, check Auto smooth, this will smooth out your surface.
Step 3: Set Particle System Properties
Now to set the thickness/height of the carpet.
Next add the carpet hairs by applying a Hair Particle System to the carpet. In the Particle System select, Hair. Also set the Emission Number to something low for now, so that you may see each individual hair strand more easily. I set mine to 100.
In the Ikea sample above we see that the Pile thickness is to 15mm, so set the Hair length to 15mm.
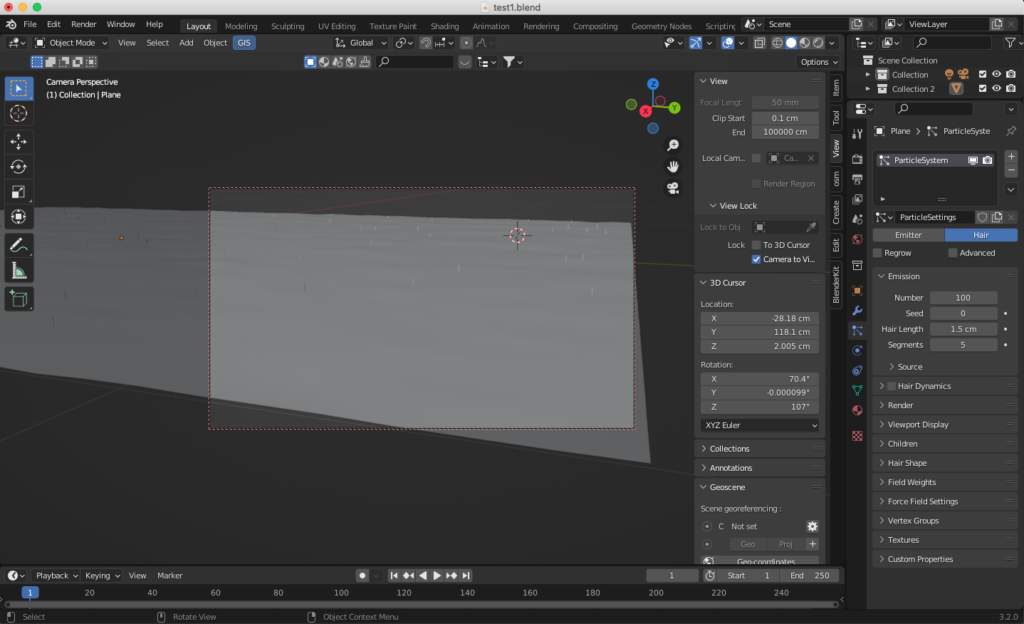
Looking at the Ikea example we see that the carpet’s hair strands look like tiny cylinders, as if the hairs were really close together and twisted around each other to create the cylinders. Additionally, the tips look like they spread out a bit.
To achieve a look as the one above I used the following settings
Step 4: Render Settings
First I changed the Hair Shape Settings under the Render tab. So go into the Rendering Properties tab and under Curves select: Strip. This will allow us to change the thickness of each strand more easily. Note: I will be Rendering in Eevee.
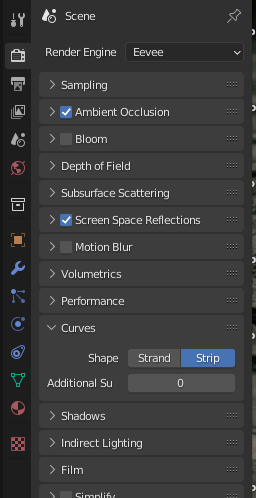
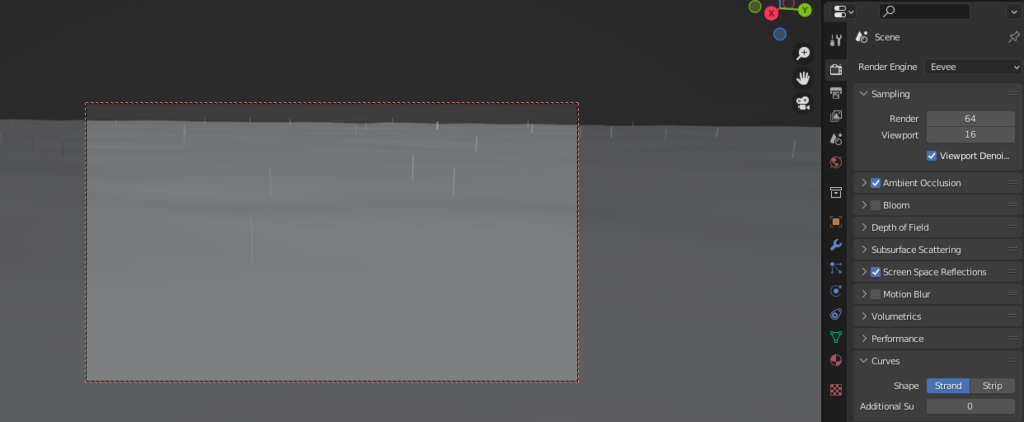
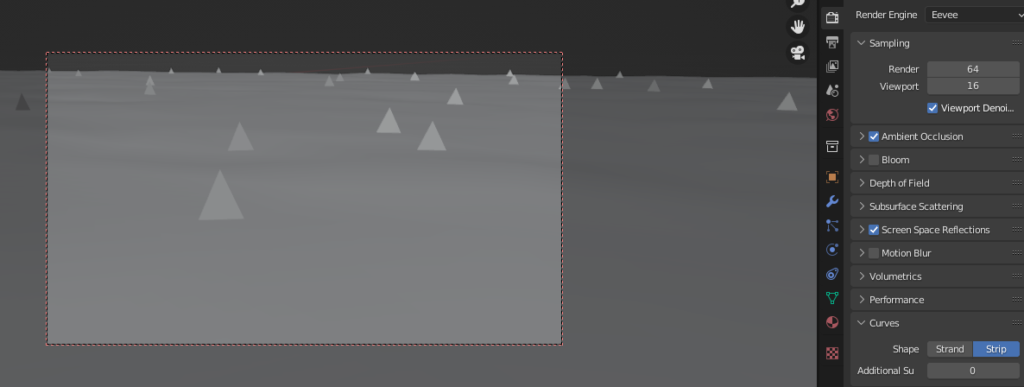
Step 5: Hair Settings
Next go back into the Particle Settings tab and expand the Hair Shape options. Play around with these settings to select how thick you want each strand to appear. For my example I chose these settings:
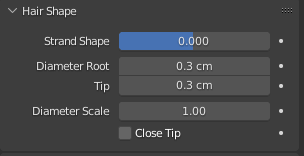
Hair Shape Settings
Strand Shape: This controls thickness between the root and tip. Negative numbers make the top more round, zero makes the hair more straight, and positive values make the bottom more round. I kept mine at “0” so that the strand can be more uniformed.
Diameter Root: Helps set the thickness of the bottom of each strand. I set mine to 3mm.
Tip: Controls the thickness of the hair tips . I set mine to 3mm.
Diameter Scale: This value multiplies the Root and Tip values. So keep it at one; so that the values don’t change. For example a two in the Diameter Scale would double the value of the Diameter Root and Tip.
Close Tip: Make sure to uncheck Close Tip, otherwise the the tip will be set to 0.
This is what the hair strand should be looking like at the moment:
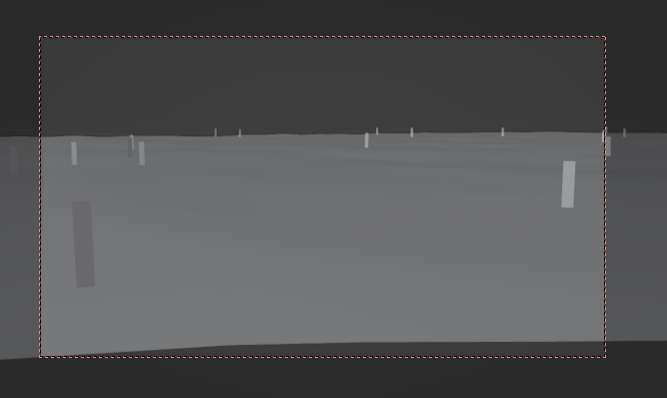
At the moment the Hair strands are looking like planes. To make them look more like a cylinder we need to add more hairs around each strand and also make sure that they stay pretty close to each other, so that they can form a cylinder. For that open up the Children tab in the Hair Particle System settings and select Simple.
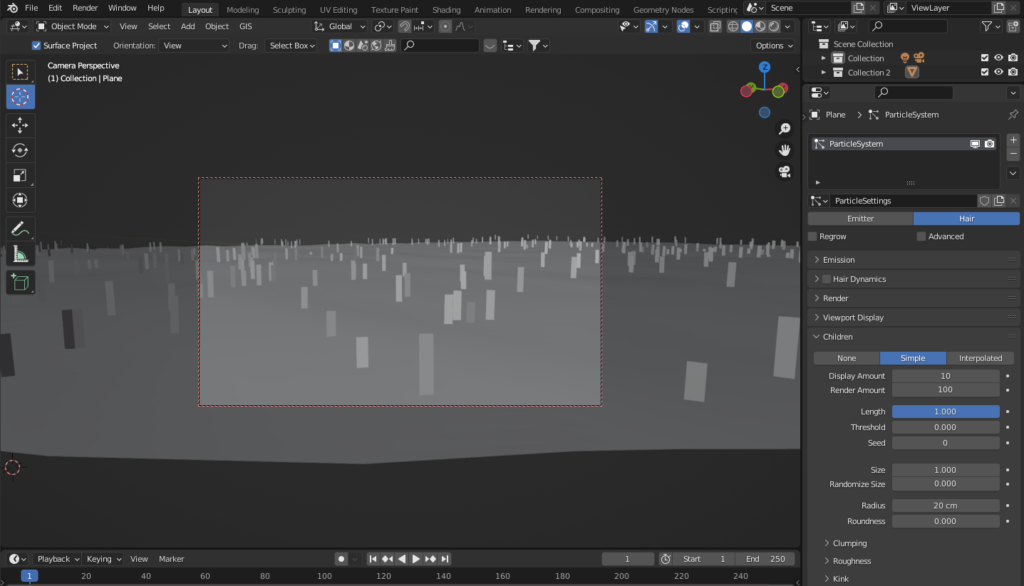
The Display Amount is the number of additional hairs that were created around the original Hairs. Rendered Amount is the additional hairs that will be added around the original Hairs once you render the image. 8 is a good number so change both Display and Render Amount to 8.
At the moment the newly created hairs look like just additional hairs. That is because they are too far from the original hairs. To bring the newly created hairs next to the original strands, we need to change the Radius. The Radius specifies how far the children hairs should be from the original parent hairs. Let’s change the Radius to 3mm. This will move the children hair closer to the parent hairs and make them more compact and give the hairs the cylinder look we are looking for.
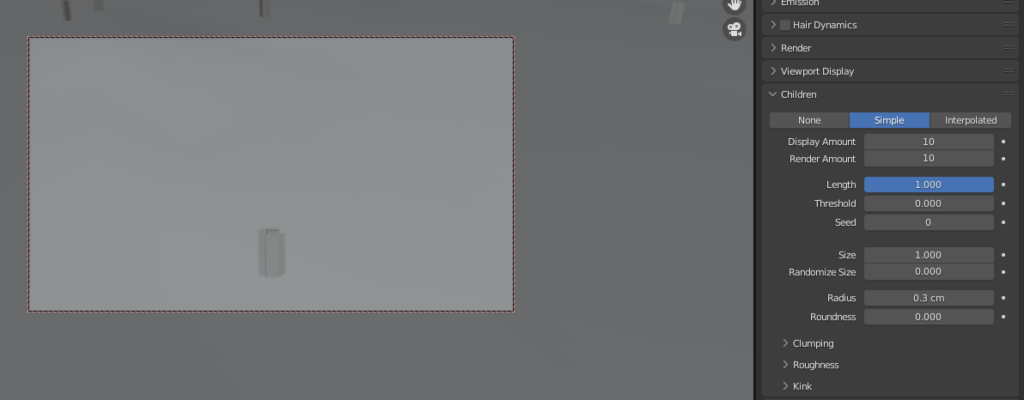
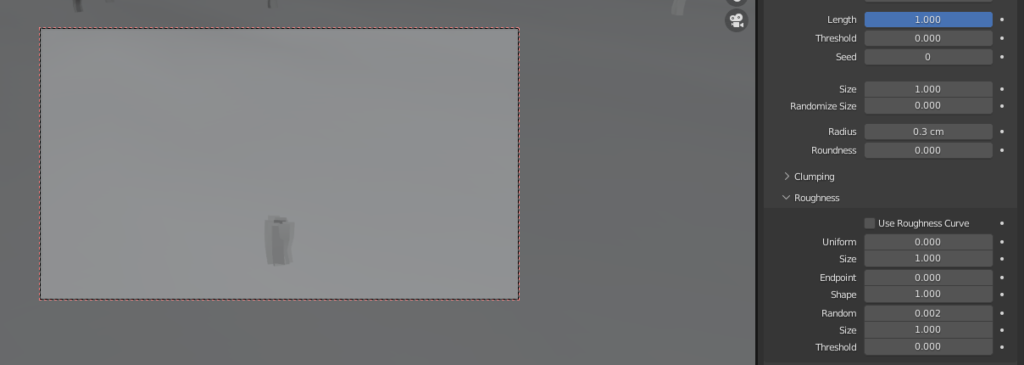
Now that we have the Cylinder going, we can open up the Roughness tab and increase the Random value slightly to .002, to give our Cylinder a small bend.
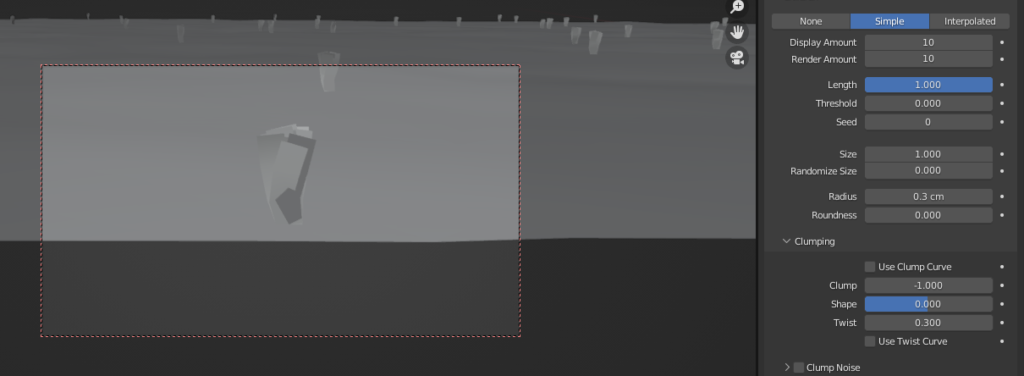
Next we saw that the cylinders in the Ikea example had the tips spreading outwards. To achieve that Under the Clumping options let’s change the Clump values to -1, this will bring the roots (bottom of the hairs) closer together and make the tips look more spread out. Also let’s increase the Twist value to 0.3 under Clumping to make the hairs hug each other more.
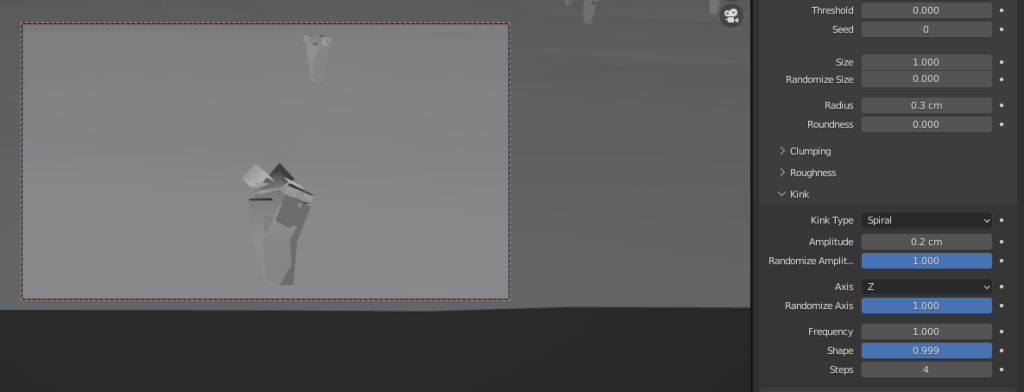
Next under the Kink settings let’s choose Spiral. These settings will allow us to play around with the way the tips move. For instance, to make the tips move randomly. Set the Amplitude to .02, this determines the offset to the tips. Set the Random Amplitude value to 1, this will make the Strand tips seem more scattered. The Axis, leave at Z, but set the Randomize Axis to 1, to rotate the hairs in various direction on the Z axis. For Frequency leave at 1. This would essentially control the number of spirals, but we don’t need them, because the length of our hairs is too low, so having spirals on the tips is not relevant to us.
To learn more about the Kink modes and how they behave, visit: https://docs.blender.org/manual/en/latest/physics/particles/emitter/children.html
Step 6: Add the carpet texture.
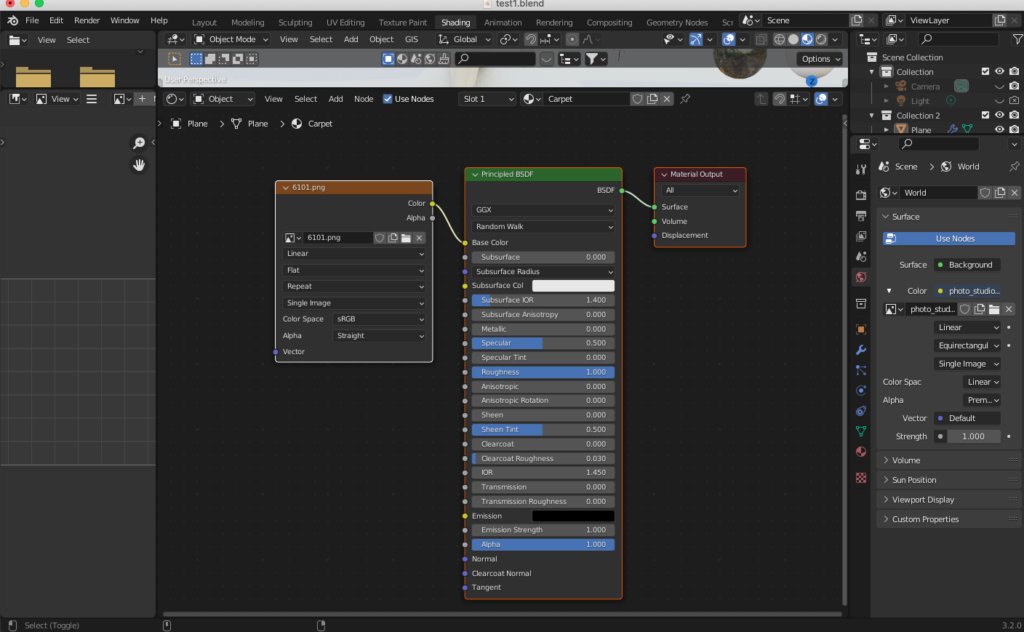
A. Next go to the Shading TAB and create a new material.
B. Rename it Carpet.
C. Keep the Principal BDSF shader. If you want to give your carpet strands some shine, reduce the ROUGHNESS and increase the CLEARCOAT a bit.
D. Next still in the material settings right click, and add an IMAGE TEXTURE. On the Image Texture node press OPEN and locate the carpet artwork you would like to add.
E. Then drag the color node and plug it into the Principal BDSF Base color.
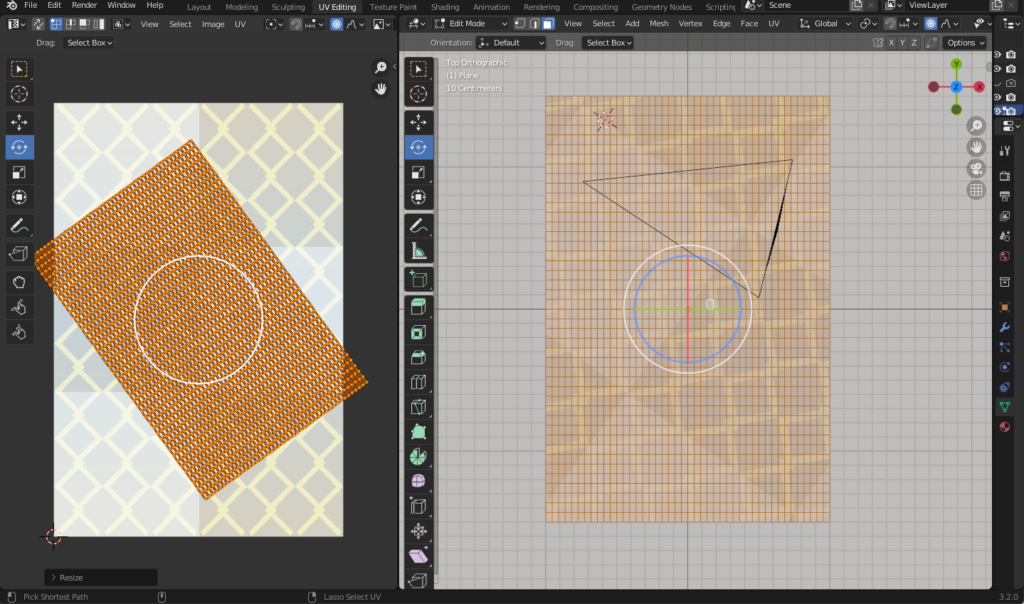
Step 7: UV Editing (Optional)
If you want to play around with the placement of the texture, go to the UV editing tab. And change the scale or rotation of your mesh, to change the look of the carpet.
Step 8: Rendering
This is pretty much it, next step will be to get the file ready to Render. For that let’s quickly jump back into the Hair Particle System settings and increase the Hair Emission to 200,000 and Render our image. Feel free to change this number to something that will look good for your carpet.
We are done! Those are the steps I used to model a carpet within Blender.
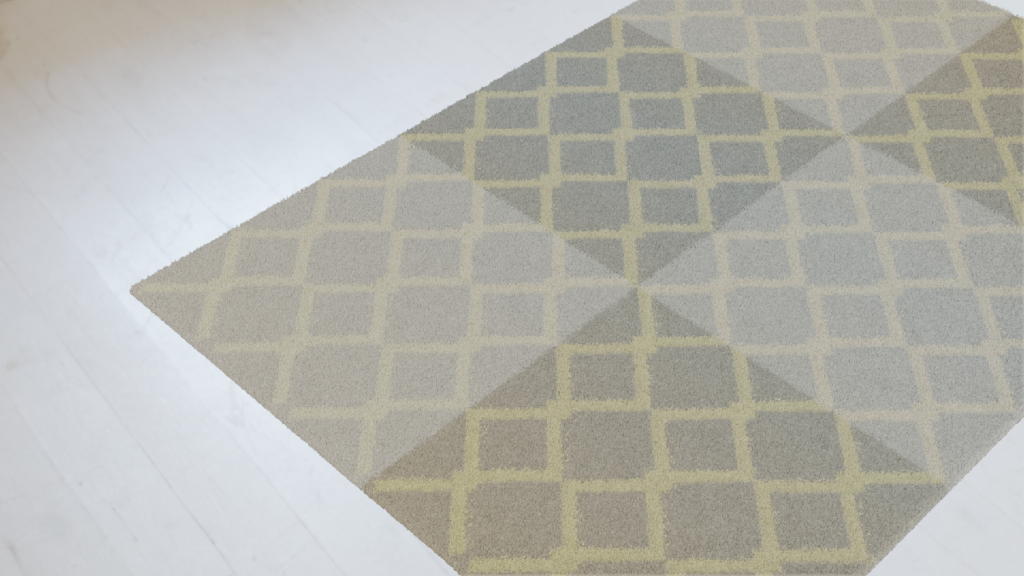
If you need to find a pattern for your carpet I have created 10,000 carpet patterns that you can use.
The images can be accessed and downloaded for free at: https://jesusjimenez.gumroad.com.
In the end, because of the overall file size of the collection I had to upload the collection using ten different folders containing 1,000 images each.
Again, to give the hairs a particular look you can simply play with the following settings in the Hair Particles System settings.
- Emission Number (Affects the # of hairs on the surface)
- Hair Length (Sets the thickness of carpet)
- Children – Simple (Adds additional hairs to the hairs created from the emission values)
- Hair Shape (Affects the thickness of each hair strand)
- Kink (Affects the shape of the Hair).
I will be making another collection using darker colors if you are interested, make sure to follow me on Gumroad where I will be loading them up too.
https://jesusjimenez.gumroad.com also, find me on Twitter at https://twitter.com/StoneJaguar3000.